This is the second part of a post showing the typical steps required to install and configure a medium sized SharePoint Server 2010 farm. By medium sized, I mean a server comprising 1 web front end, 1 application and a two server SQL cluster. The installation and configuration of SQL is not within the scope of this post.
Other pages of this post include:
- Part 1 – General Notes and Installation Accounts
- Part 3 – Application Server Installation and Configuration
- Part 4 – Additional Configuration
Installing and Configuring SharePoint 2010 Web Front End
The first thing we’ll setup is the Web Front End (WFE) server.
Login to the Web server as the setup account for the farm and locate the installation source for SharePoint Server 2010. To start the installation, double click the Setup.exe application. If some of the prerequisites are not present on the server you’ll receiver an error stating that the setup process was unable to proceed due to pre-requisite errors. If this is the case, follow the steps outlined below.
Prerequisite Installation
Close the error dialog and run the application called PrerequisiteInstaller.exe instead.
This is a simple installation process with no customisation required, it may however take a while to complete.
Reboot the server to complete the installation.
Service Pack
At the time of writing, the latest service pack is SP1, which can be found here: SPS 2010 Service Pack 1. The file is around 400Mb in size.
It’s possible to apply this service pack during the installation of the main product. To do this, follow the steps described below. Alternatively, you can apply the service pack after the installation of SharePoint. The only difference is that the process will take that bit longer.
To perform this update, you will need to add additional files to the SharePoint installation folder. To do this, either copy the files from your installation disc or extract the ISO to the server.
Next, download the latest service pack and once complete, open a command prompt and navigate to the folder containing the it.
Type the following:
officeserver2010sp1-kb2460045-x64-fullfile-en-us.exe /extract:c:\sps_2010\updates
The above command starts with the name of the service pack application you downloaded, followed by the extract parameter, which takes the path to the extracted installation folder and the updates sub folder.
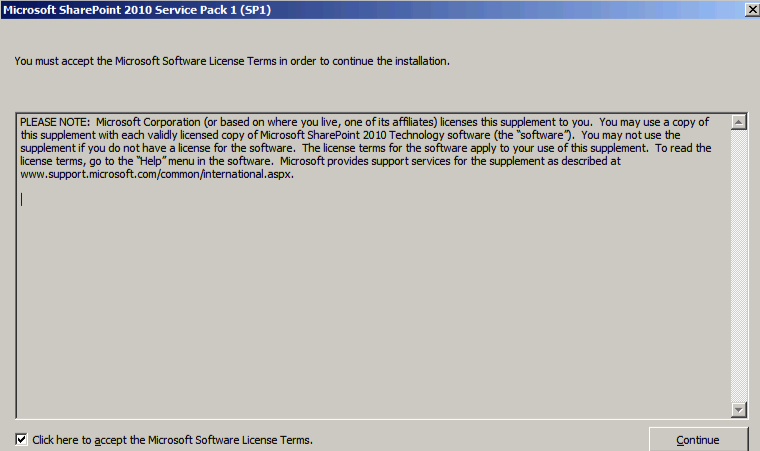
After running the above command, the following screen will display:
Tick the checkbox to agree to the licence terms and click the Continue button. The service pack contents will now be extracted to the updates folder.
Eventually, a message will show telling you that the installation is complete. You can now continue with the installation of SharePoint.
SharePoint Server 2010 Installation
With the prerequisites successfully installed, start the installation of SharePoint Server 2010 by double clicking the Setup.exe application.
The first thing you will be prompted to do, once the installer has completed the prerequisite software check, is to enter the licence key for SharePoint Server 2010.
The key entered can be changed at a later date, so for instance if you were to use a key for the standard edition it will be possible to upgrade to the enterprise edition by simply changing the product key.
Enter your product key and click Continue to progress with the installation.
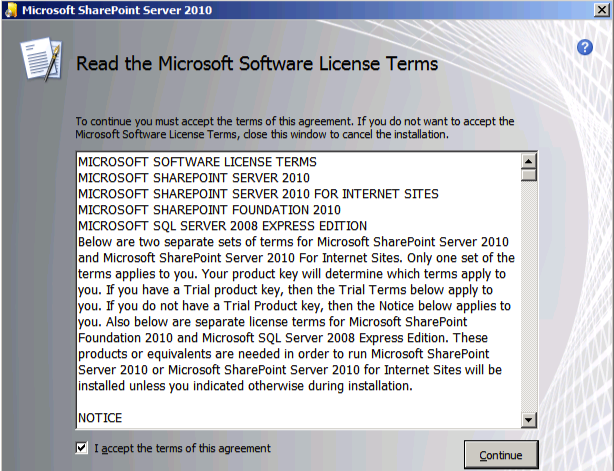
The next screen displays the licence for SharePoint, where you should accept the agreement and click the Continue button.
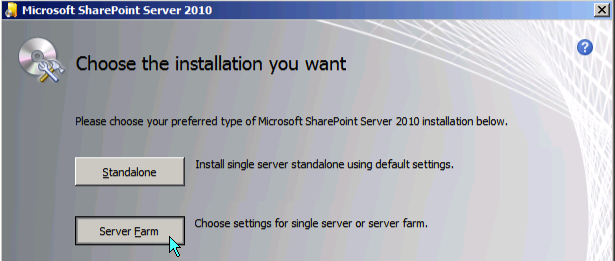
From the next screen, select Server Farm to continue.
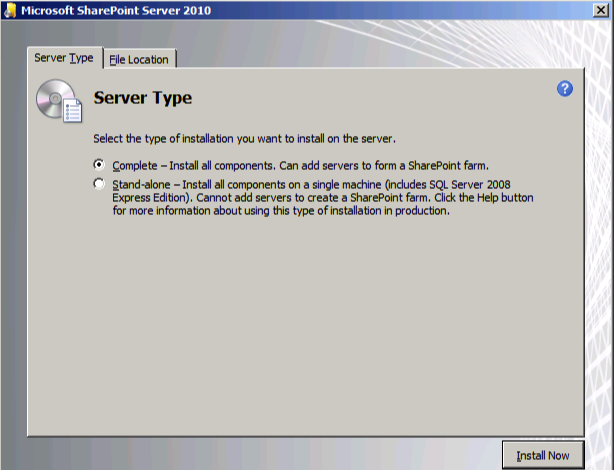
The subsequent screen allows you to further refine the installation type for the farm. As we’ll be installing a WFE and Application server, which will connect to a separate SQL server, select Complete and click Install Now.
The installation screen will now display. This may take some time to complete. Once the installation has successfully completed, the run configuration wizard dialog will be displayed.
Ensure the Run Configuration Wizard option is selected and click the Close button to continue.
Web Front End Configuration
To configure the server as a WFE server, start the configuration wizard for SharePoint, which if you ticked run in the previous dialog, will be automatically loaded after the installation of SharePoint. Alternatively, start the application SharePoint 2010 Products Configuration Wizard from the start menu.
As this is the first server to have SharePoint installed, the option to select in the next screen is Create a new server farm.
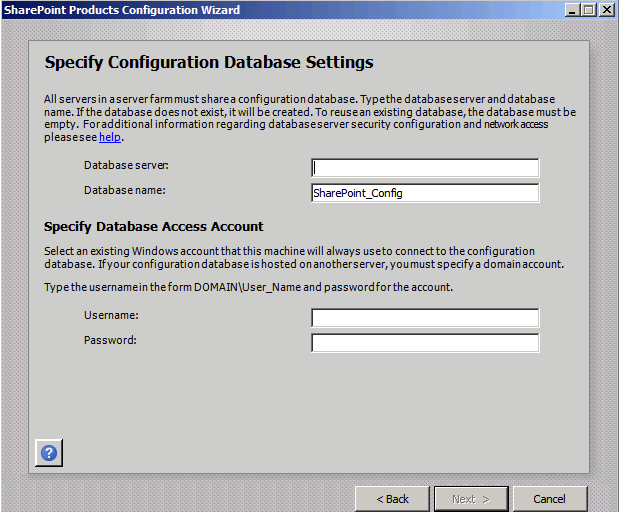
The next screen is where you specify the database settings.
For the database settings, you will need to provide the name of the SQL server and optionally change the name of the configuration database. I recommend that this is left with its default value. You will also need to provide a domain user account to use for accessing the database. The identity for this should be the one setup as the Server Farm Account, as described in the Installation Accounts section of this post.
The server farm account is used to create and access your configuration database. It also acts as the application pool identity account for the SharePoint Central Administration application pool and it is the account under which the Microsoft SharePoint Foundation Workflow Timer service runs. The SharePoint Products Configuration Wizard adds this account to the SQL Server Login accounts, the SQL Server dbcreator server role, and the SQL Server securityadmin server role. The user account that you specify as the service account must be a domain user account, but it does not need to be a member of any specific security group on your WFE servers or your database servers. It is recommended that you follow the principle of least privilege and specify a user account that is not a member of the Administrators group on your WFE or database servers.
After providing the SQL database credentials, the next stage of the configuration process is to specify a passphrase for the SharePoint farm, as shown above.
The passphrase is used for things like whenever you want to add additional servers to the farm. It’s also used if you decide to let SharePoint manage your service account passwords where it will automatically change the passwords to strong, but unknown passwords.
The next screen allows you to alter the security settings, if required. From here you can change the default port that the Central Administration site should use and the authentication provider for the web application. For the purposes of this post, there is no need to change anything on this screen.
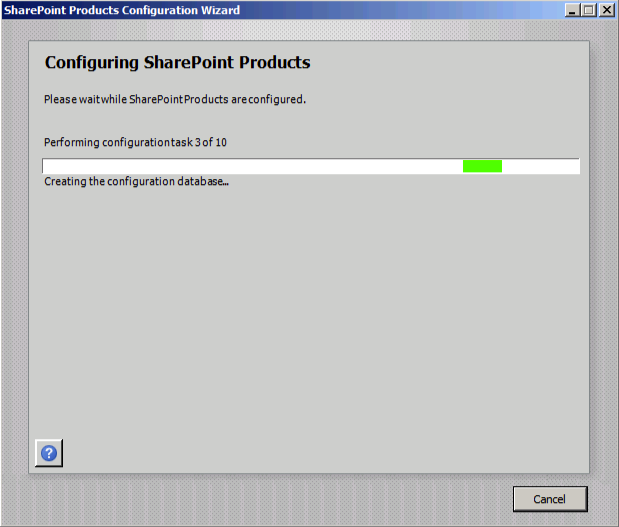
After this, you will be shown a summary of all changes that will be made during the installation. Click the Next button to commence the installation.
Once the configuration process has successfully completed, a screen similar to the summary dialog will be shown, this time confirming the installation.
This is the end of the configuration wizard process, although there is still some configuration required to complete the installation and setup of the WFE server.
Automated WFE Configuration
After clicking the Finish button, the Central Administration site will load for the first time. After being asked to participate in the Customer Experience Improvement Program, the page shown below will be loaded.
Click the Start the Wizard button to continue.
Although the wizard recommends using a different account from the farm administration account used previously, I recommend re-using it here. We will be able to change the accounts used for the services afterwards.
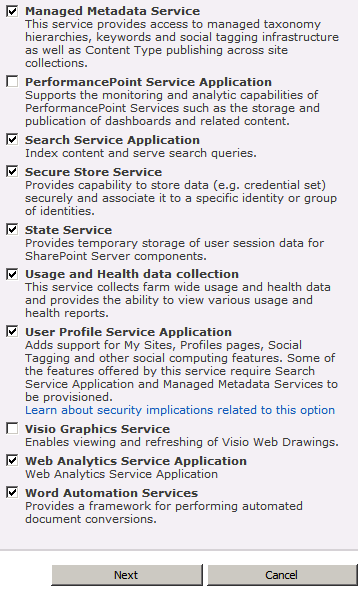
From the next page, select the services that you require and click Next to continue. This process can take a while to complete.
Once the configuration has completed, you will be prompted to create an initial top level site. Do not create a site at this point, instead, click the Skip button to continue.
You will then be shown a farm configuration completion page. Click the Finish button to complete the automated configuration.
Manual WFE Configuration
The first manual step after he automated configuration process has completed is to click on the Manage services on server link.
As there will only be one server in the farm, there is no need to specify the server in the drop down (top right of content page) but it’s definitely worth ensuring that the correct server is selected before continuing, especially when you start adding additional servers to the farm.
From the list of services, all that are required for the WFE is:
- Microsoft SharePoint Foundation Web
- Search Query and Site Settings Service
- SharePoint Server Search (Only the functionality that is necessary for the query processor)
- Central Administration
All other services should be stopped. We will enable some of these on the application server that will be installed and configured once the WFE configuration has been completed.
We are now ready to move on to the installation and configuration of the Application server. We are unable to complete the configuration of the WFE until the additional server has been added to the farm.
Continue to part three of this post.









how about the installation of powerpivot / InfoPath services
Guide is for how to install on a multi-server farm. It’s not intended to cover every service available. PowerPivot is a separate installation and InfoPath doesn’t require much configuration.