Looking to design your own external content type and deploy it as part of a SharePoint solution? Read on for a walkthrough on how to create one.
First up, the steps are the same for SharePoint 2010 and 2013 and have been carried out using Visual Studio 2012. Visual Studio 2010 will also work.
Before I start the walkthrough, I’ll summarise the goal of this post:
We have a very simple database that contains a couple of tables – Customer and Order. An external content type will be created and via a view on the database, will return a list of customers and their orders. The external content type will only allow read access to this information.
Assumptions:
- There is a Business Data Connectivity service up and running on the SharePoint farm for the External Content Type (ECT) to be deployed to.
- The user deploying the solutions containing the ECT, in this case the user running Visual Studio, has adequate permissions to create it in the application service.
- This is just a demonstration, so there will be a distinct lack of logging, error handling and bad practices such as storing database credentials in plain text within the code, try to ignore this 🙂
OK, let’s get going.
Open Visual Studio and either load your existing SharePoint project or create a new one.
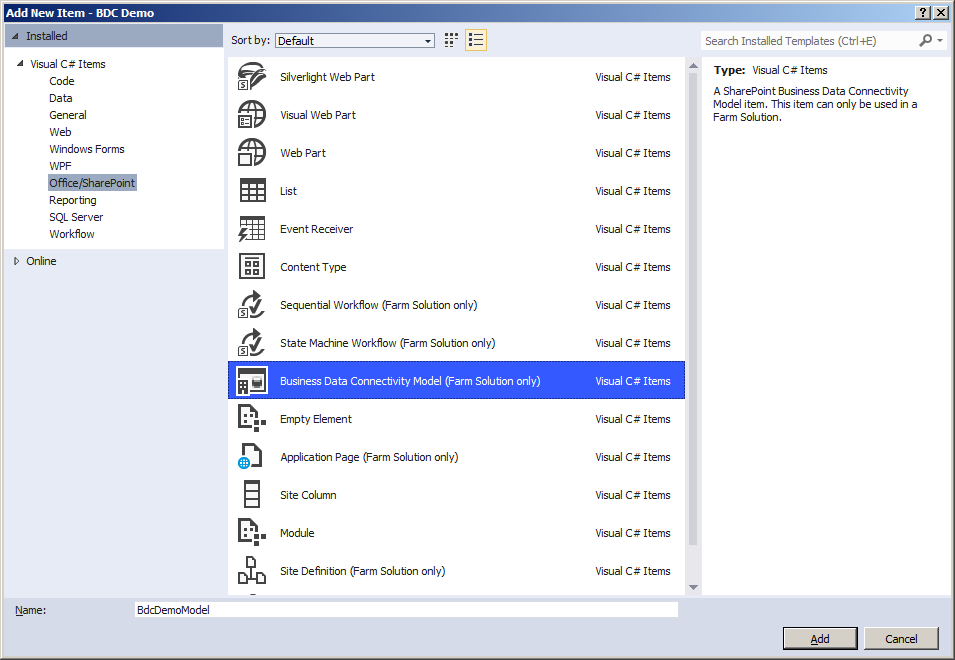
The first thing we need to do is create the Business Data Connectivity Model, so go ahead and add one to your project.
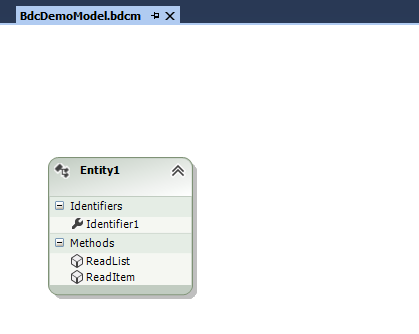
Which will show something very similar to the following screenshot:
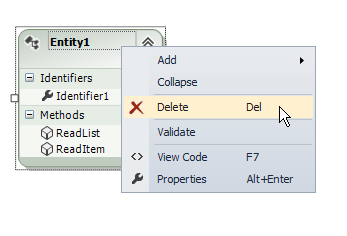
It easier to start with a clean slate, so delete the existing entity from the diagram.
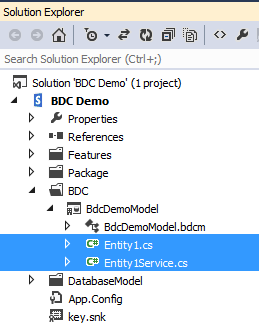
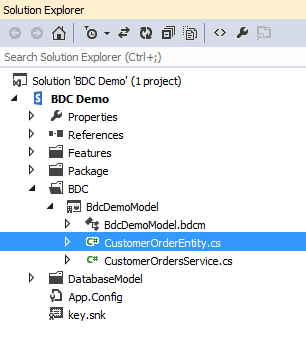
In the Solution Explorer pane, delete the Entity1 and Entity1Service classes.
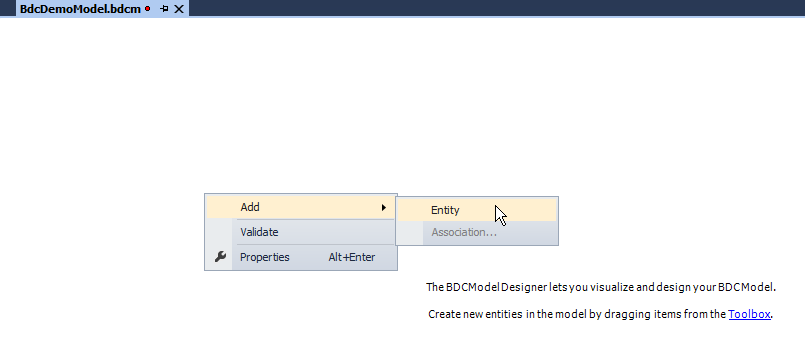
Back in the Model, add a new entity.
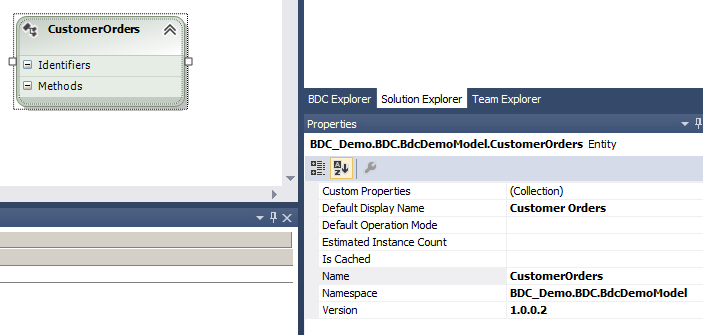
Next, rename it to CustomerOrders.
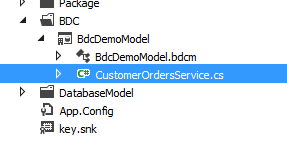
Note the new service class that was automatically created for you.
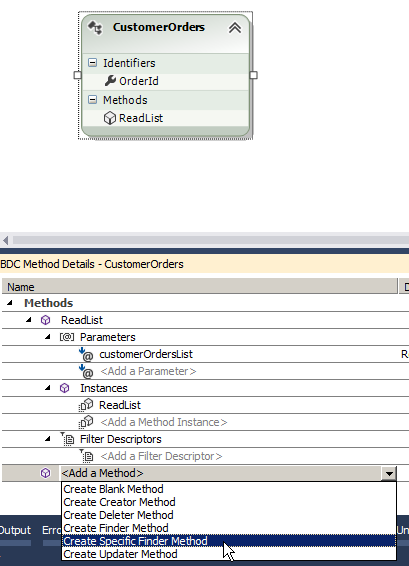
There are a couple of requirements for all external content types. These stipulate that there must be a method for retrieving a single item and another for retrieving a collection of items. We’ll start with the multiple items method. In the BDC Method Details pane, expand the Add a Method drop down and select Create Finder Method
This will add a method called ReadList to the CustomerOrders entity.
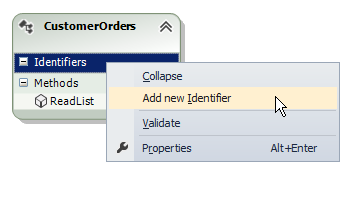
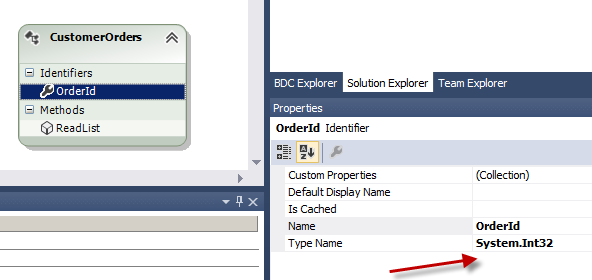
All entities require at least on identifier, so to create one right click on the entity in the diagram and select Add new Identifier.
In this example, the identifier is called OrderId.
To update this, select the new identifier in the entity and change the name and type to OrderId and System.Int32, which corresponds to the primary key field in the database.
While adding the new entity to the model, a service class was automatically created for you. We also require a class to define the fields we want used by the external content type. Add a new class to the project called CustomerOrderEntity.
Update the class with the following code:
public partial class CustomerOrderEntity { public int OrderId { get; set; } public int CustomerId { get; set; } public string Title { get; set; } public string Forename { get; set; } public string Surname { get; set; } public string Town { get; set; } public string ItemTitle { get; set; } public decimal Cost { get; set; } } |
These map directly to the database view columns that will drive the content.
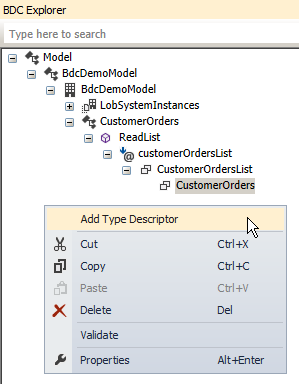
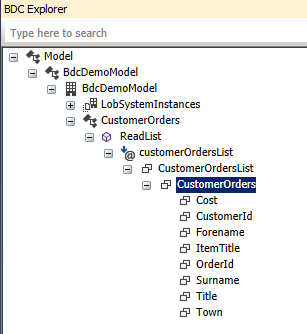
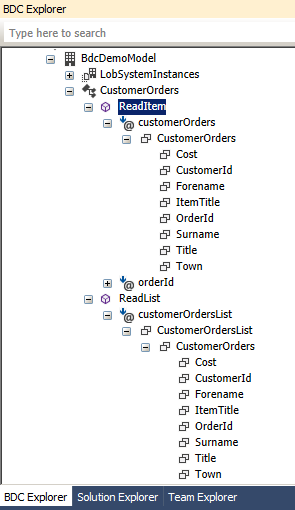
Back in the model, open the BDC Explorer pane and navigate down to the CustomerOrders node within ReadList.
From there, right click it and add a new type descriptor.
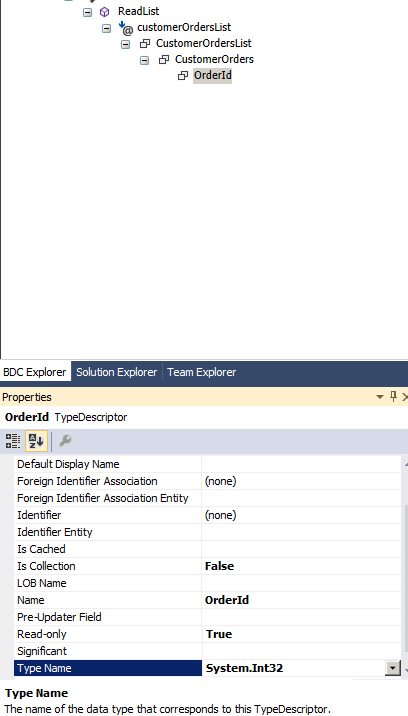
The new type descriptor is going to map to the first property in the customer order entity class that you just created.
To do this, select the new type descriptor in the BDC Explorer pane and in the Properties pane update it so the Name is OrderId and the Type Name is System.Int32.
Repeat this process for the remaining properties.
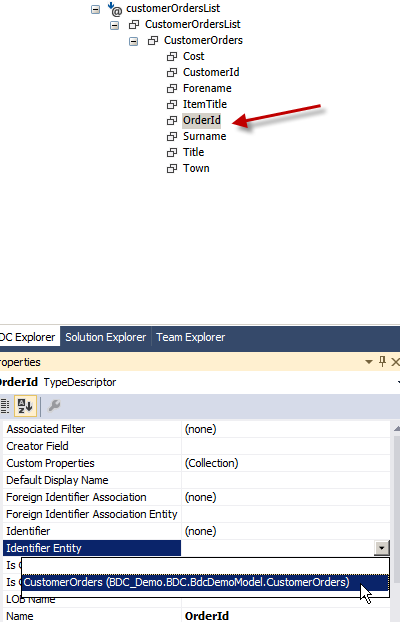
With the type descriptors in place, we need to let the model know which one maps to the identifier the was added to the entity. To do this, select OrderId in the BDC Explorer pane and in the Properties pane for it set the Identifier Entity to CustomerOrders.
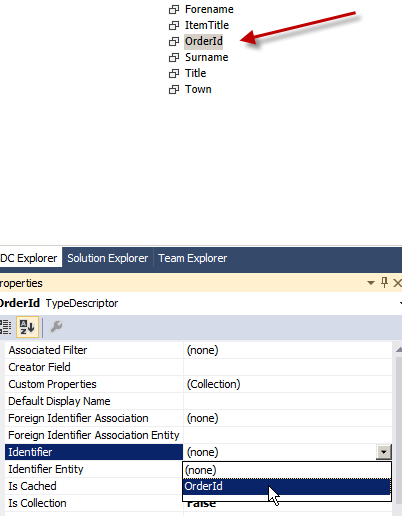
Next, set the Identifier property to OrderId.
To complete the ReadList configuration, select the CustomerOrders node. In the Properties pane, open the drop down for the Type Name property, change to the current project tab and select the item titled CustomerOrderEntity. This is the class you added previously and tells the model what type of object to expect this node to process.
With the first finder method almost complete, we’ll now add the specific finder method to allow single items to be retrieved.
As before, expand the Add a Method drop down in the BDC Method Details pane, this time selecting Create Specific Finder Method.
After doing this, all the type descriptors you manually created for the ReadList method will be automatically add to the new finder method for you.
Now onto the parameters for the two new methods that you just created.
Starting with ReadList, highlight the row in the BDC Method Details pane where the direction type is return, clicking on the Type Descriptor column.
The type name for this is currently set incorrectly and needs to map to the customer order entity class that was manually added to the project.
To do this, open the drop down list for Type Name in the properties pane, select the tab for the current project and select the CustomerOrderEntity item.
Do the exact same for the ReadItem method.
That should be the model complete, at least as far as this demonstration is concerned. You’ll be able to follow similar steps to add filters that allow you to limit the number of items returned, for example.
If you take a look at the CustomerOrderService class you’ll see a couple of methods have already been added, each one mapping to the finder method that you added via the model diagram.
public static IEnumerable<string> ReadList() { throw new System.NotImplementedException(); } public static string ReadItem(int orderId) { throw new System.NotImplementedException(); } |
As mentioned at the start of this post, the purpose of this is to provide a walk through on creating a simple external content type, so I won’t go into the implementation of these methods in detail, although, if you’re interested in seeing this up and running I have provided the full source code for the sample. You’ll find a link for this at the end of this post.
The code that should replace the above is:
public static IEnumerable<CustomerOrderEntity> ReadList() { IEnumerable<CustomerOrderEntity> orderEntities; using (var dbEntities = new DemoDbModelDataContext(GetConnectionString())) { IList<vCustomerOrder> orderRecords = (from customerOrder in dbEntities.vCustomerOrders select customerOrder).ToList(); orderEntities = from record in orderRecords select ConvertToCustomerOrderEntity(record); } return orderEntities; } public static CustomerOrderEntity ReadItem(int orderId) { using (var dbEntities = new DemoDbModelDataContext(GetConnectionString())) { vCustomerOrder customerOrderRecord = GetCustomerOrderByOrderId(dbEntities, orderId); CustomerOrderEntity orderEntity = ConvertToCustomerOrderEntity(customerOrderRecord); return orderEntity; } } private static readonly Func<DemoDbModelDataContext, int, vCustomerOrder> GetCustomerOrderByOrderId = CompiledQuery.Compile( (DemoDbModelDataContext context, int orderId) => context.vCustomerOrders.FirstOrDefault(d => d.OrderId == orderId) ); private static string GetConnectionString() { var builder = new SqlConnectionStringBuilder { DataSource = ".", InitialCatalog = "BDC_DemoDb", IntegratedSecurity = true }; return builder.ConnectionString; } private static CustomerOrderEntity ConvertToCustomerOrderEntity(vCustomerOrder taskCtView) { var customerOrderEntity = new CustomerOrderEntity { OrderId = taskCtView.OrderId, CustomerId = taskCtView.CustomerId, Title = taskCtView.Title, Forename = taskCtView.Forename, Surname = taskCtView.Surname, Town = taskCtView.Town, ItemTitle = taskCtView.ItemTitle, Cost = taskCtView.Cost }; return customerOrderEntity; } |
Which you can see uses the LINQ to SQL data model to access the SQL data and transforms the result to the types the BDC model expects.
Deploying
Once all the SQL code has been wired up, go ahead and deploy the solution.
Once deployed, the farm scoped feature will automatically activate and create the external content type in Central Administration for the BDC service that is defined for the current web application.
Drilling into the content type you can see the fields that are available.
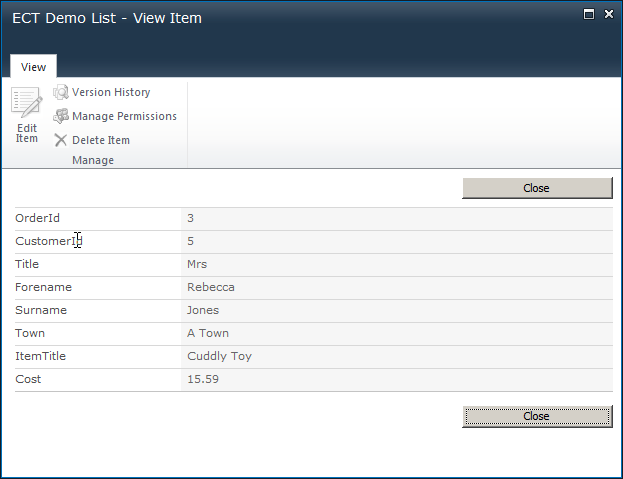
In a site collection for the same web application, create a new external list and associate the external content type with it. Viewing the list should present you something like the following:
For a single item:
Code
To download the code and database schema for this walk through, click on the following link.

